Adding Content
Once you have created your scene, you can start customizing it by adding content. The XR Creator supports a wide variety of media.
Note that to publish to the metaverse, Creator projects have a size limit of 128MB.
Uploading Content
You can upload your own assets to use in Creator. You have a few ways of doing this:
- Drag and drop:
- You can drag + drop content into the viewport window to upload it to Creator. Projects have a size of 128MB, and files used in the project must be below that size.
- Assets:
You can use already existing assets from the metaverse or dashboard, or save one that you want to keep between all the platform instances. To upload them:
Go to the ‘Asset’ tab in the resources panel.
Click the 'Add' button and upload the desired file.
3D Models
Creator allows you to search 3D content from Sketchfab. You can find collections in the assets media browser.

If you have existing .glb or .glTF models, you can upload those to your asset library as well.
Dynamic Material and Emissive Colors for 3D Models
You can select 3D models with dynamic colors and change their material/emissive colors within the scene. To do so, just pick the 3D model whose color you wish to adjust. Then, in the properties panel, activate the "Enable material color" checkbox.
Then you will be able to alter the color of the material of your object or adjust the emissive color:
Primitive Mesh
Primitive meshes serve as basic building blocks for creating complex 3D objects.
You can choose primitive models and modify their geometry, color, measurements, and more. Simply select the Primitive Mesh element and adjust it in the Properties panel as desired.
3D Model Spawners
If you want to create a room that has a specific 3D object that people can make copies of, you can create a ‘Spawner’ element. This can be helpful for making it easy to have a scene that can allow multiple people to quickly get their own copies of the same object. To do this, you will want to copy the URL of the model that you want, create a ‘Spawner’ element from the Asset panel > Elements tab, and paste the URL into the properties box.
Images
Images can be added to Creator with a 2D projection or a 360 degree equirectangular projection (a format that could be used as a skybox or other type of scene background). You can upload images or gifs from your own computer or use the built-in search tool from within Creator to find media online.
Audio
You can add links to .mp3 files to add audio to your metaverse project. Also, the audio clips can be directly uploaded using the scene editor’s upload forms.
If there are issues with different audios playing simultaneously, repeating, or starting prematurely, the audio controls can be adjusted from the properties panel.
Properties
Controls: This option toggles the visibility of the media controls (play/pause, volume).
Auto Play: This property enables the audio to begin playing as soon as the user enters the Verse or lobby.
Loop: When this option is enabled, the audio will continuously repeat in the scene.
Enable audio by proximity: If this option is selected, the audio will start when the user approaches within a specific range that can be defined in the Proximity Audio option. More details can be found in the Objects that activate based on proximity.
Don't Play Audio Twice: This attribute ensures that the audio is played only once for the user. If the scene is reloaded by the user, the audio will not replay. However, after a 24-hour period, the audio will be available to play again once by the same user.
Start Audio only Inside the Scene: This guarantees that the audio will only commence when the user enters the metaverse room, rather than starting while the user is still in the lobby.
Override Audio Settings: This property allows you to modify the default audio stream settings. By default, our platform employs the PannerNode audio type and an inverse distance model to decrease the audio source’s volume as it moves away from the listener.
Video
You can upload videos in Creator to create a permanent player for video content. Creator attempts to automatically play any type of streaming video content or live stream.
You can configured your videos to automatically play and loop. To change or delete the link once it is published in the metaverse, you will have to always remove it and configure it in the XR editor. If you want to temporarily add a video that can be removed, you may want to consider adding it to the Metaverse and pinning it to your room instead.
If you want to use additional types of feeds, such as a screen or window share from your desktop or your webcam, you can add these after you create a Verse with your project. Currently, screen and camera sharing cannot be instantiated inside of Creator.
Transparency for Videos
You can integrate transparent videos into metaverse scenes, this unlocks a new level of realism for your scenes.
The process is simple. You will only need a video with a chroma background, typically using a blue or black screen. Once imported into the metaverse editor, activate the "Invisible Background" checkbox.
Once your scene is published, the designated chroma color will be transformed into transparency.
3D Text Elements
If you wish to include text alongside any of the objects or portals within your project, you have the option to incorporate 3D text elements into the XR Creator.
For this, simply add the Text element into the scene and adjust the text words within the properties panel.
You can also change the size, color, letter spacing, etc.
Adding timer for portals in events lobby
One of the properties panel options of the 3D text is the Event Slug propertie, which allows you to connect the text to the information of a presentation from an existing event.
Steps to Set Up the Event Scenes
Begin by designing a lobby scene using the XR Editor. This is where you can incorporate portals or show the presentation details in any way you want.
Next, set up an event on our Dashboard. The event should include at least one presentation and a lobby that utilizes the scene you’ve just created. For guidance on event creation and scene selection, refer to our Event section.
After creating the event, proceed to modify the lobby scene. Choose a Troika Text element and place it at your desired location within the scene.
In the Event slug field, input the slug of the event you’ve created (this is the final part of the event URL that contains the event title).
Upon doing this, a dropdown menu will automatically appear, listing the presentations and the type of text with dynamic information for each presentation. Choose the presentation whose details you want to display in the Scene, followed by the type of text to be shown.
Repeat this process for each piece of text you wish to display. Once done, publish the scene and review the lobby on the event landing page.
PDFs
You have the option to upload PDFs or use a PDF element and link it via URL. PDFs will be displayed as default 3D elements once the project is published to the Metaverse.
Enabling 2D View
To enhance your viewing experience, you can select the "Use 2D view" option in the properties panel. This allows you to view PDFs as 2D elements in the 2D view in the Metaverse, making it easier to scroll and read the content comfortably.
Particle Emitter
The particle emitter is an XR Creator object that spawns moving particles. You can change the image of the particles, their size, lifetime, start and middle color, etc.
Links
You can include links in your scene to point to other Metaverse rooms or to different places on the web. To create a link element in Creator, under Elements, select the 'Link' element. When your link element is selected, paste your URL into the properties panel.
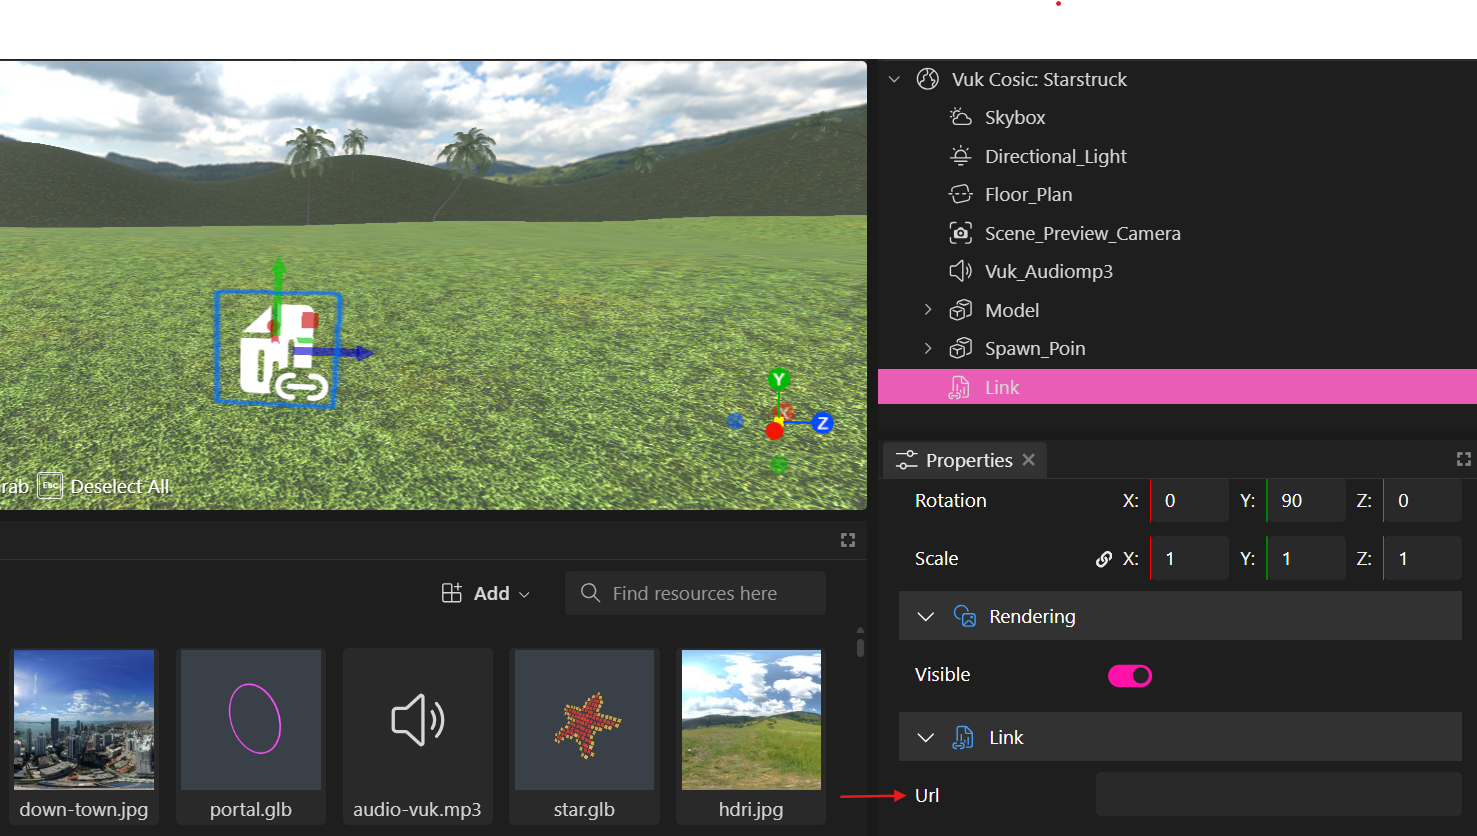
When your scene is published and used to create a room in the Metaverse, the URL will be resolved to its file type and displayed according to the content type. If you use a URL to a general website, the platform will attempt to take a screenshot and display that content where the link element is placed. If the URL cannot be resolved, it will display a broken media image instead.
Utilizing an Image/Video as a Portal
Another option available is to employ a specific image or video as a portal or external link.
To do this, you'll need to upload your file and position it within the viewport.
Then, in the properties panel, input the URL for the corresponding Metaverse room or scene in the "Link Href" field.
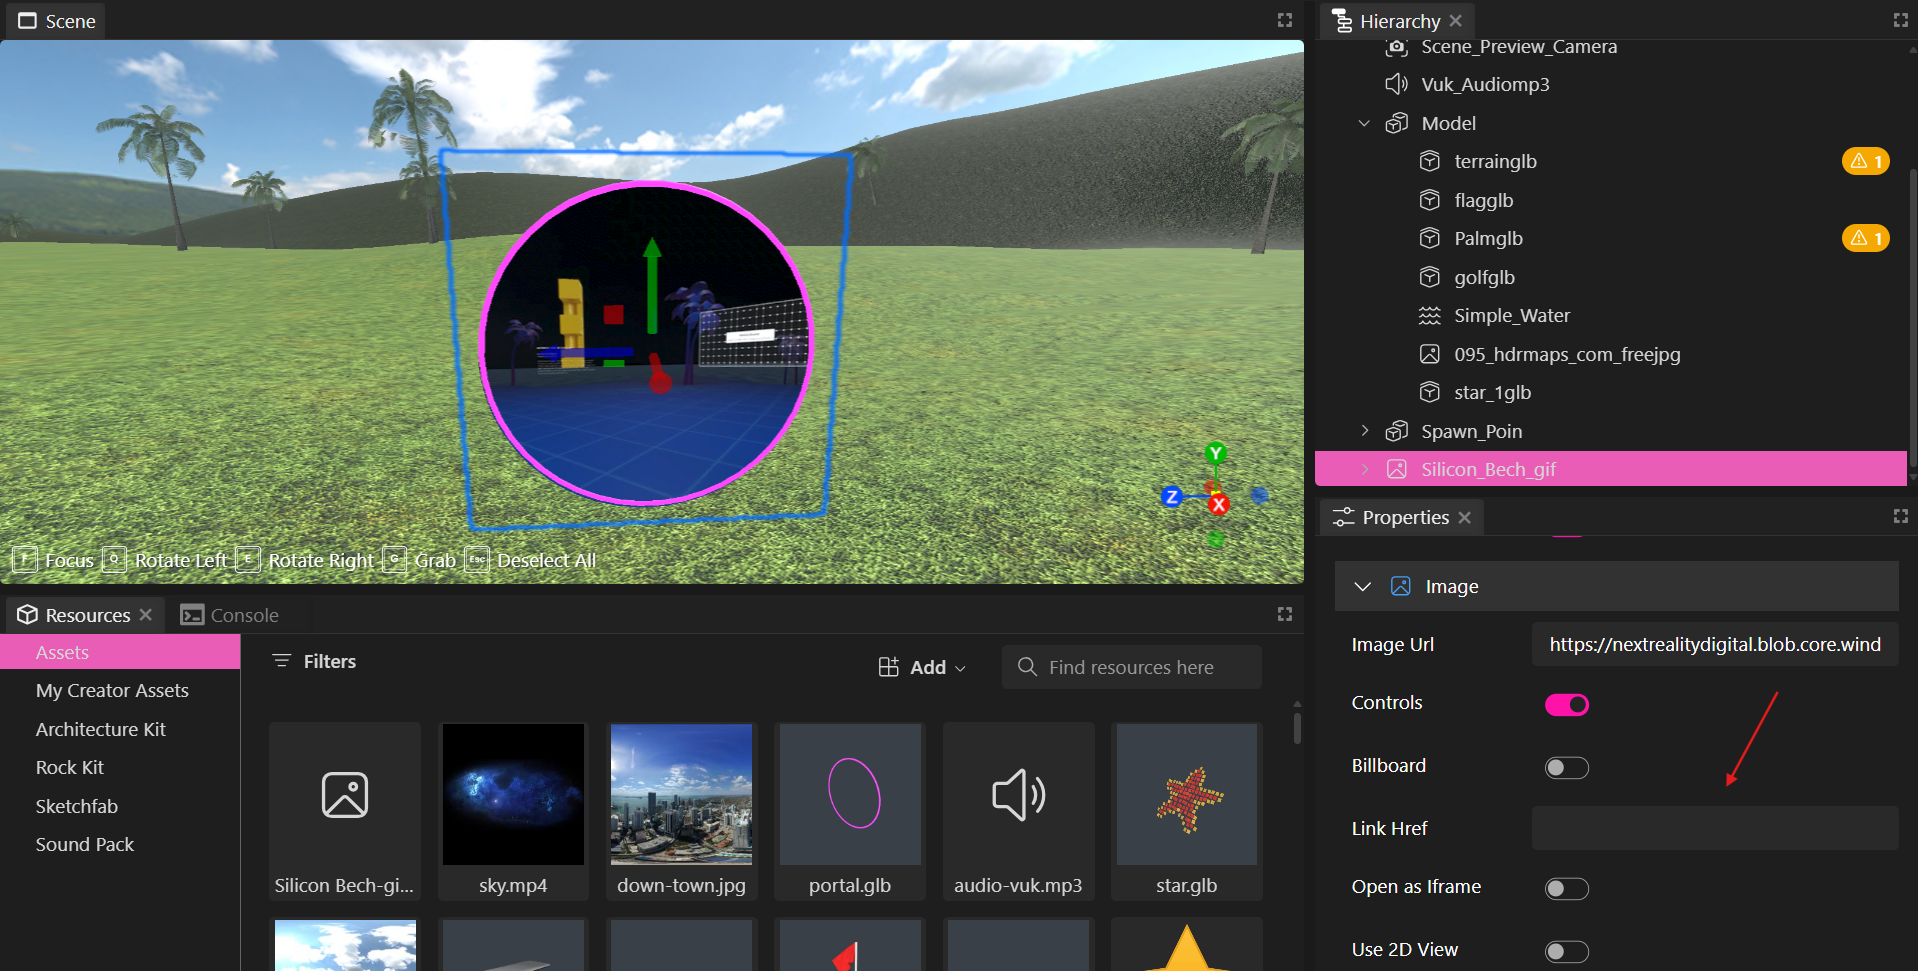
Once you have published your scene, the image will display a "Jump" option when hovered over, functioning as a portal.
You can also choose not to show the "Jump" message by checking the "Hide Link Href Button" option in the properties panel.
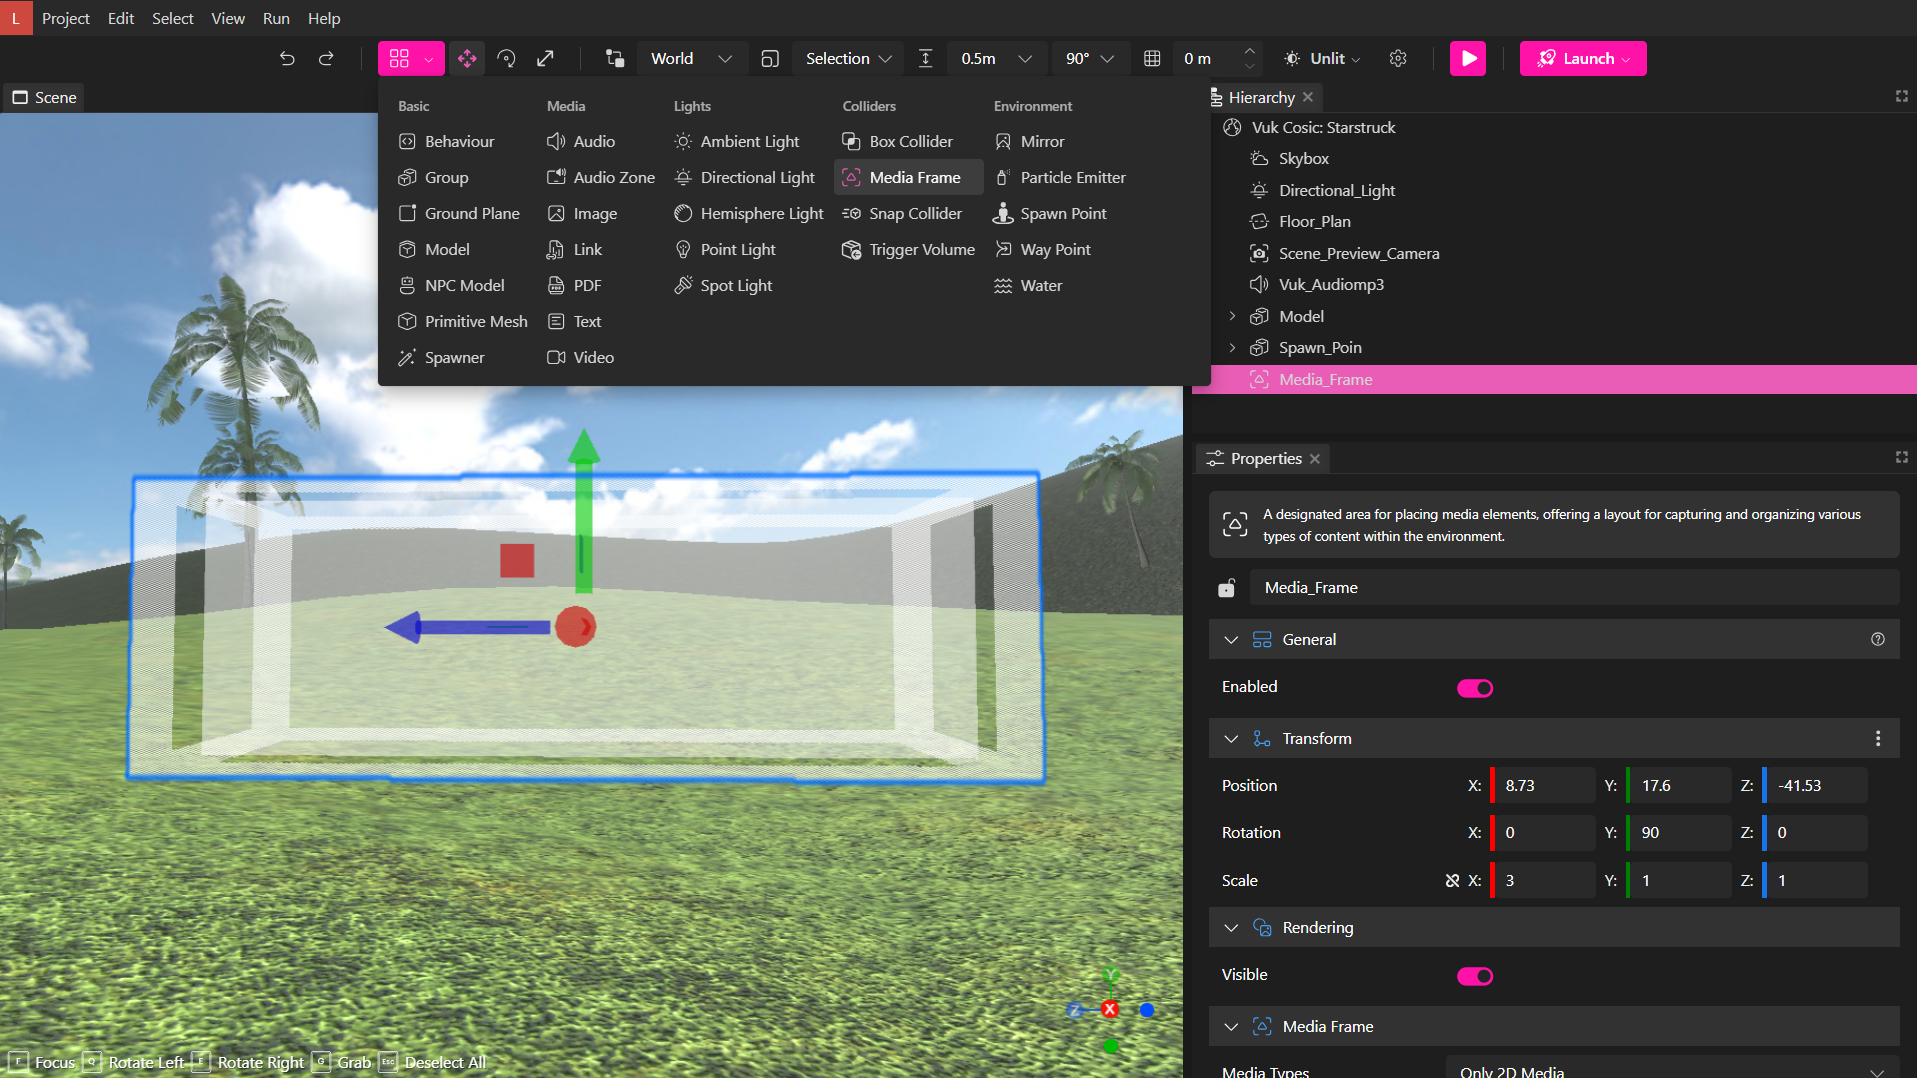
Media Frames
You can use the Media Frame element to designate areas you would like media objects to snap to in-world. Media Frames can accept both 2D media and 3D models, you can select the type of media accepted in the properties panel.
Snap Collider
The snap colliders work similarly to the media frames, but they’re designed to specify larger zones where multiple objects can be snapped into the same space and arranged within that boundary.
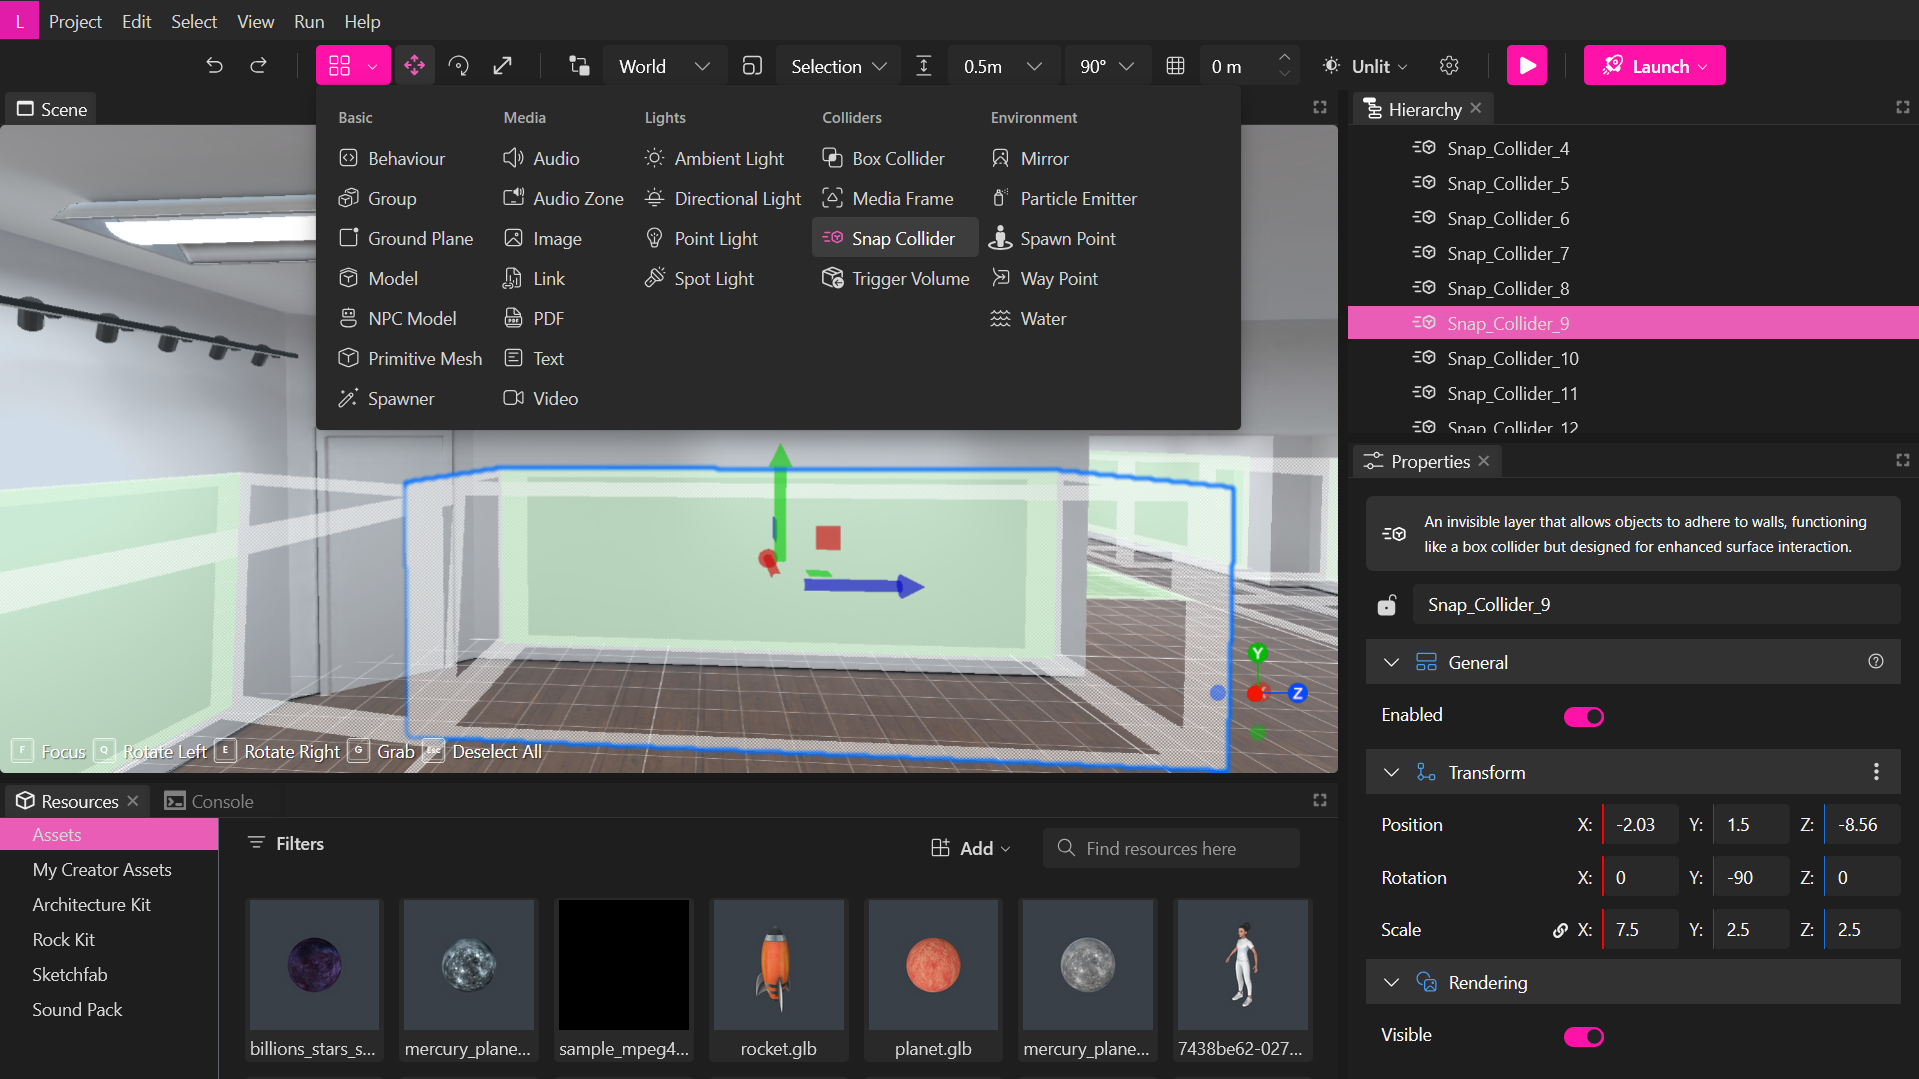
This feature is particularly useful for galleries or scenes where you’d like users to utilize expansive areas to display their artwork.
Objects that activate by proximity
In your projects, you can add objects, audios or group together an MP3 file and a 3D object, with or without animation, and enable the proximity-activation options in the properties panel.
By customizing the proximity radius, you can signal when the animation or audio will be triggered based on the proximity of the user.
Add waypoints for seats
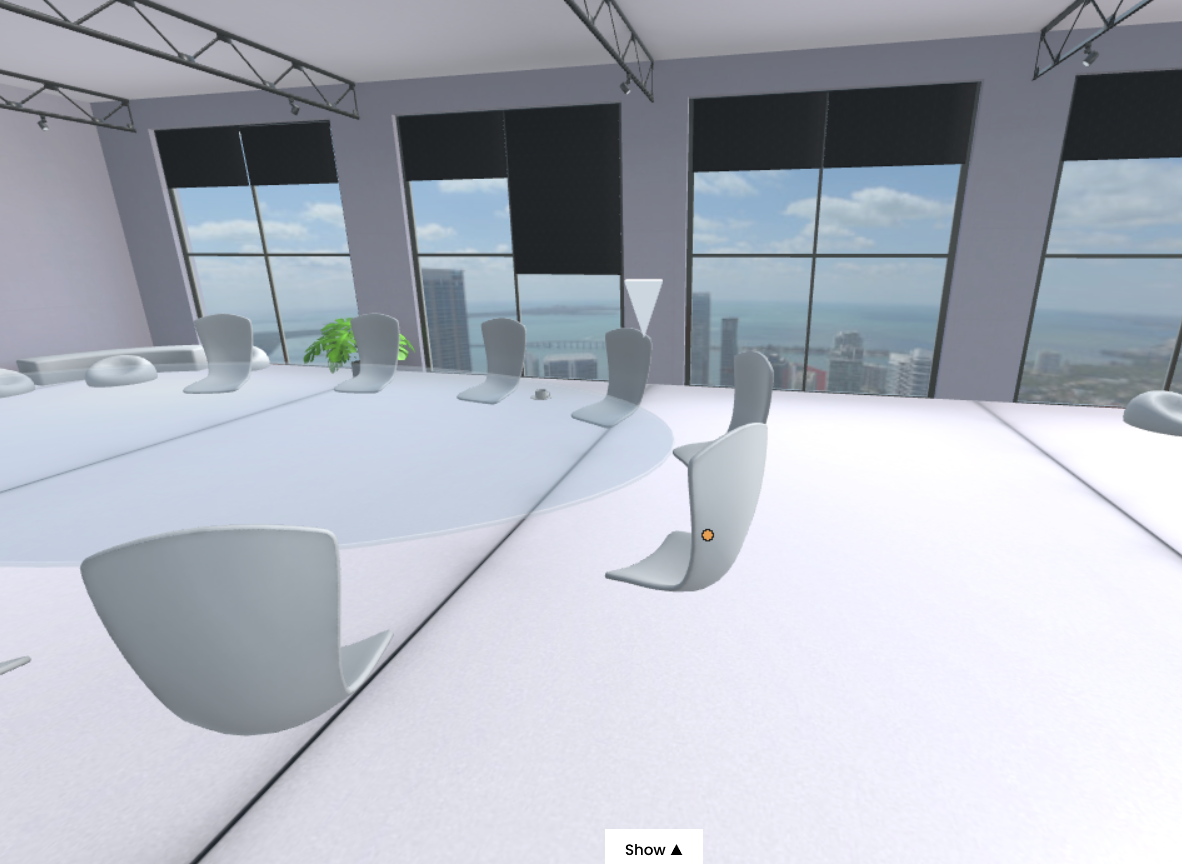
To create a verse with seats for people to sit in, you can add waypoints to the seating objects.
For this, simply select a waypoint from the Elements panel and put it over the object you want to use as a seat.
In the properties panel of the waypoint, select the "clickable" and "can be occupied" options so that the chairs can be clicked on and occupied by only one person at a time.
Done! Once you publish your scene, the users will see a triangular indicator will when they hover the object, signaling that it can be occupied.
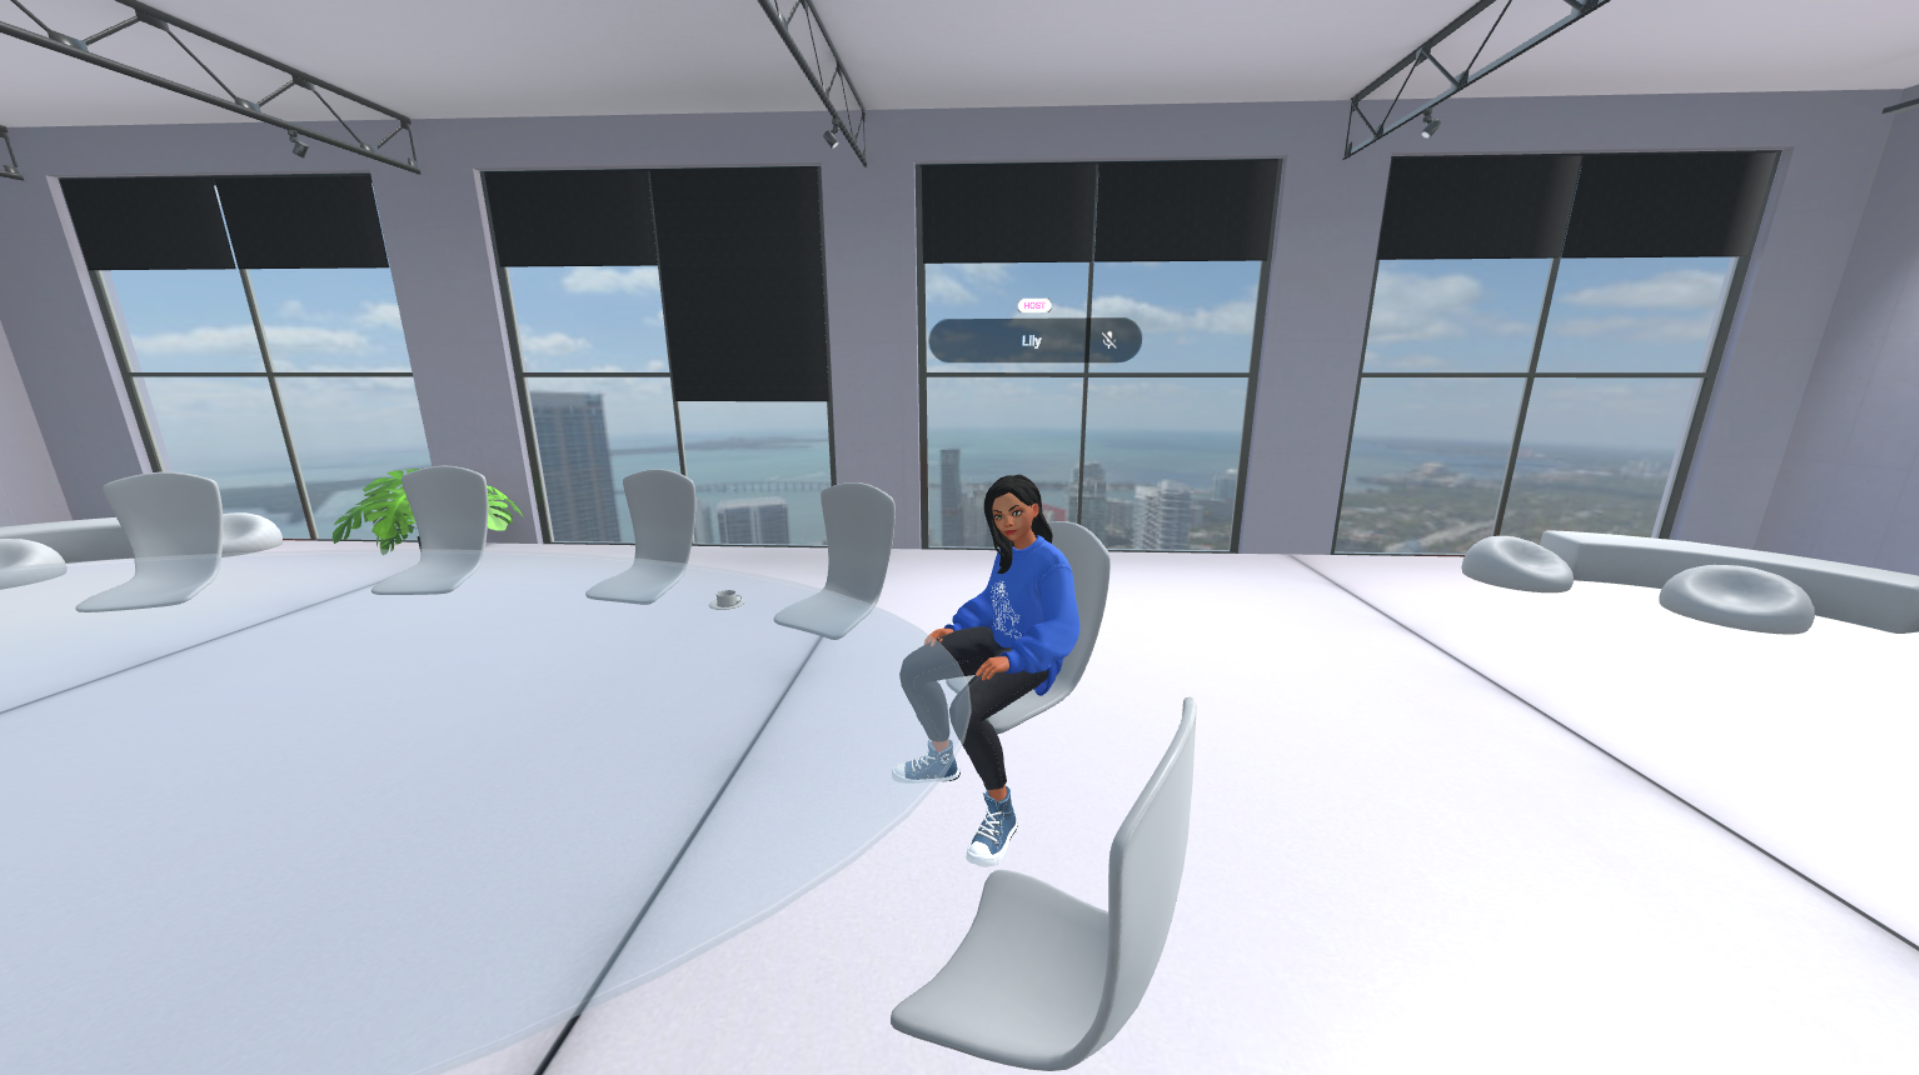
Activate sit animation for full-body avatars
You have the choice to activate sit animations directly from the editor for full-body avatars. Let's explore the process!
To begin, you should create waypoints as you've done previously, ensuring that you enable the options for "clickable" and "can be occupied".
Next, you'll want to access the dropdown menu for “Sit animation” and choose the one that suits your seating arrangement best.
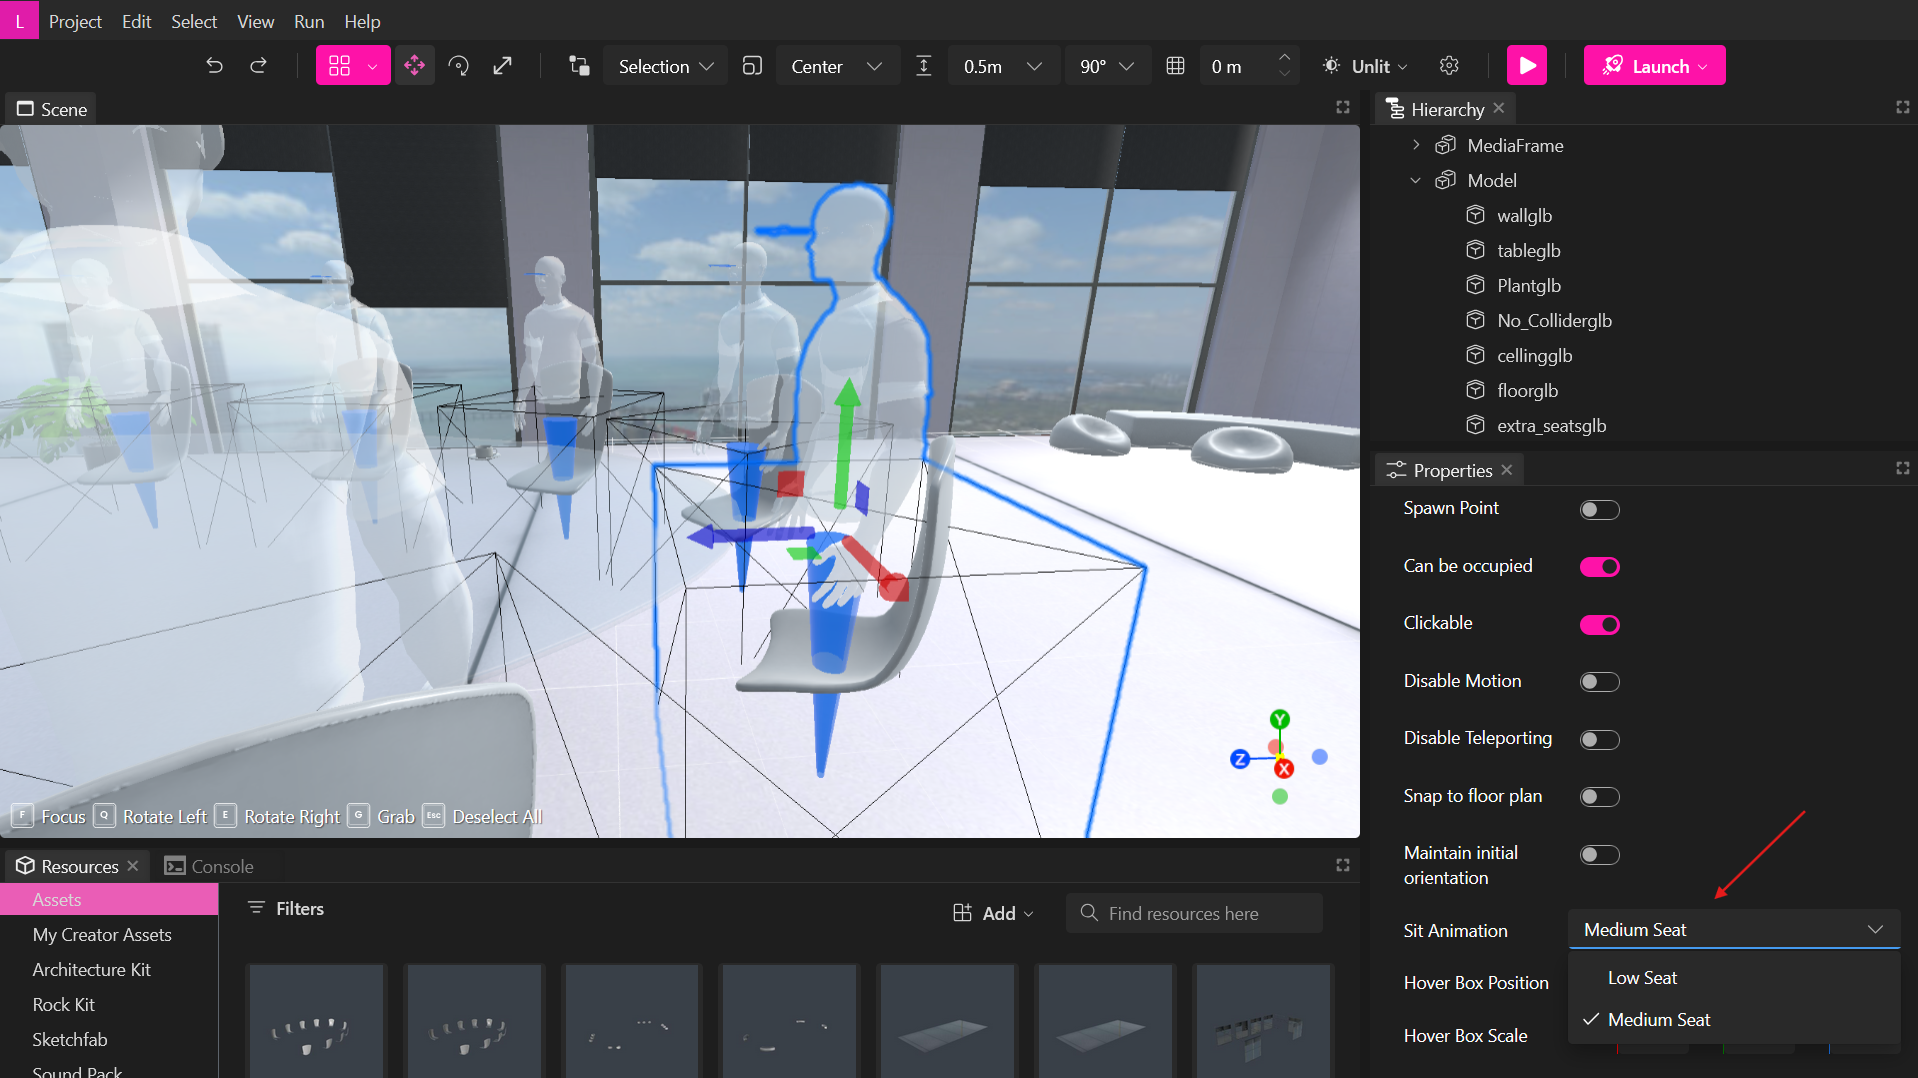
Remember to publish and test the scene to confirm that the chosen avatar animation works correctly with your chair. If necessary, you can always switch between a low/medium sit animation or adjust the waypoint's height accordingly.
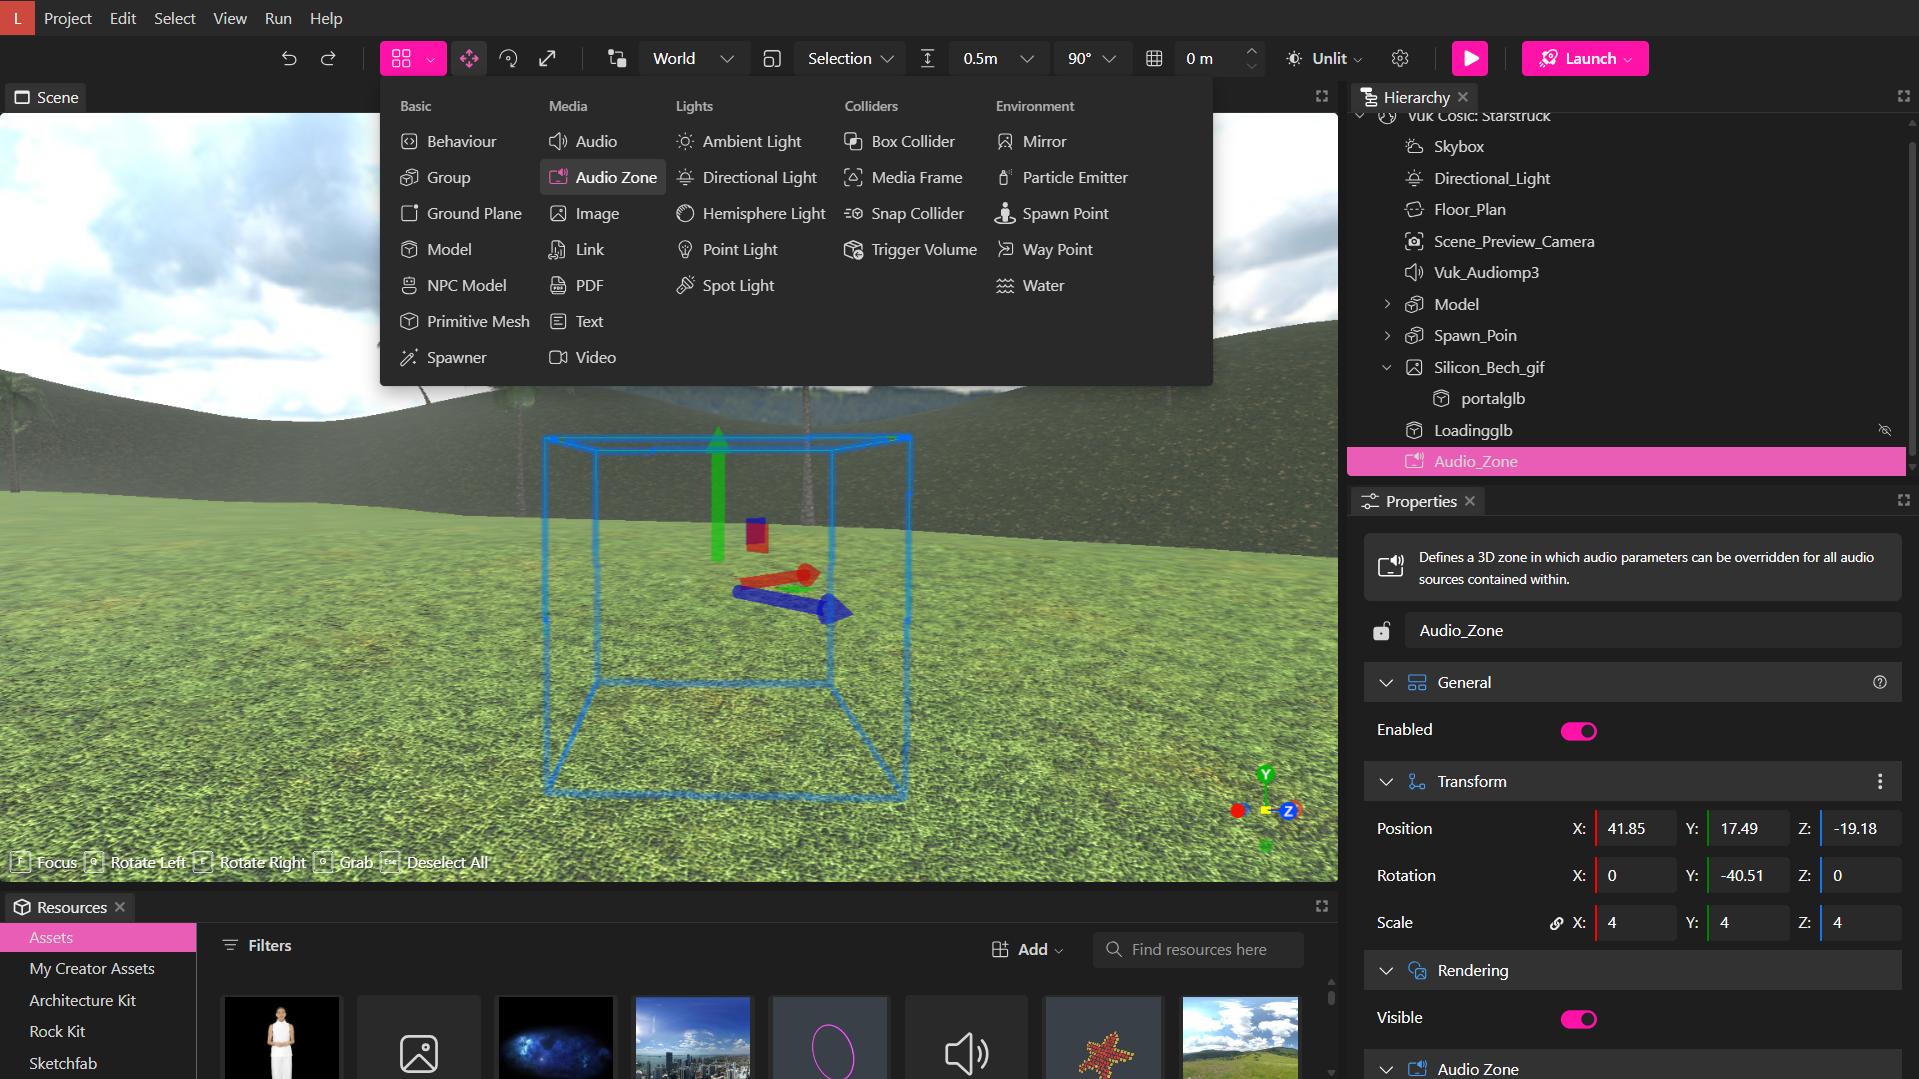
Audio Zones
Audio Zones are 3D volumes that modify the audio properties of audio sources (avatars, videos, audios, audio targets, etc) based on the source's and listener's positions with respect to the audio zone. One obvious application would be to dim audio sources' volumes based on 3D areas like rooms to mimic the real world behavior.
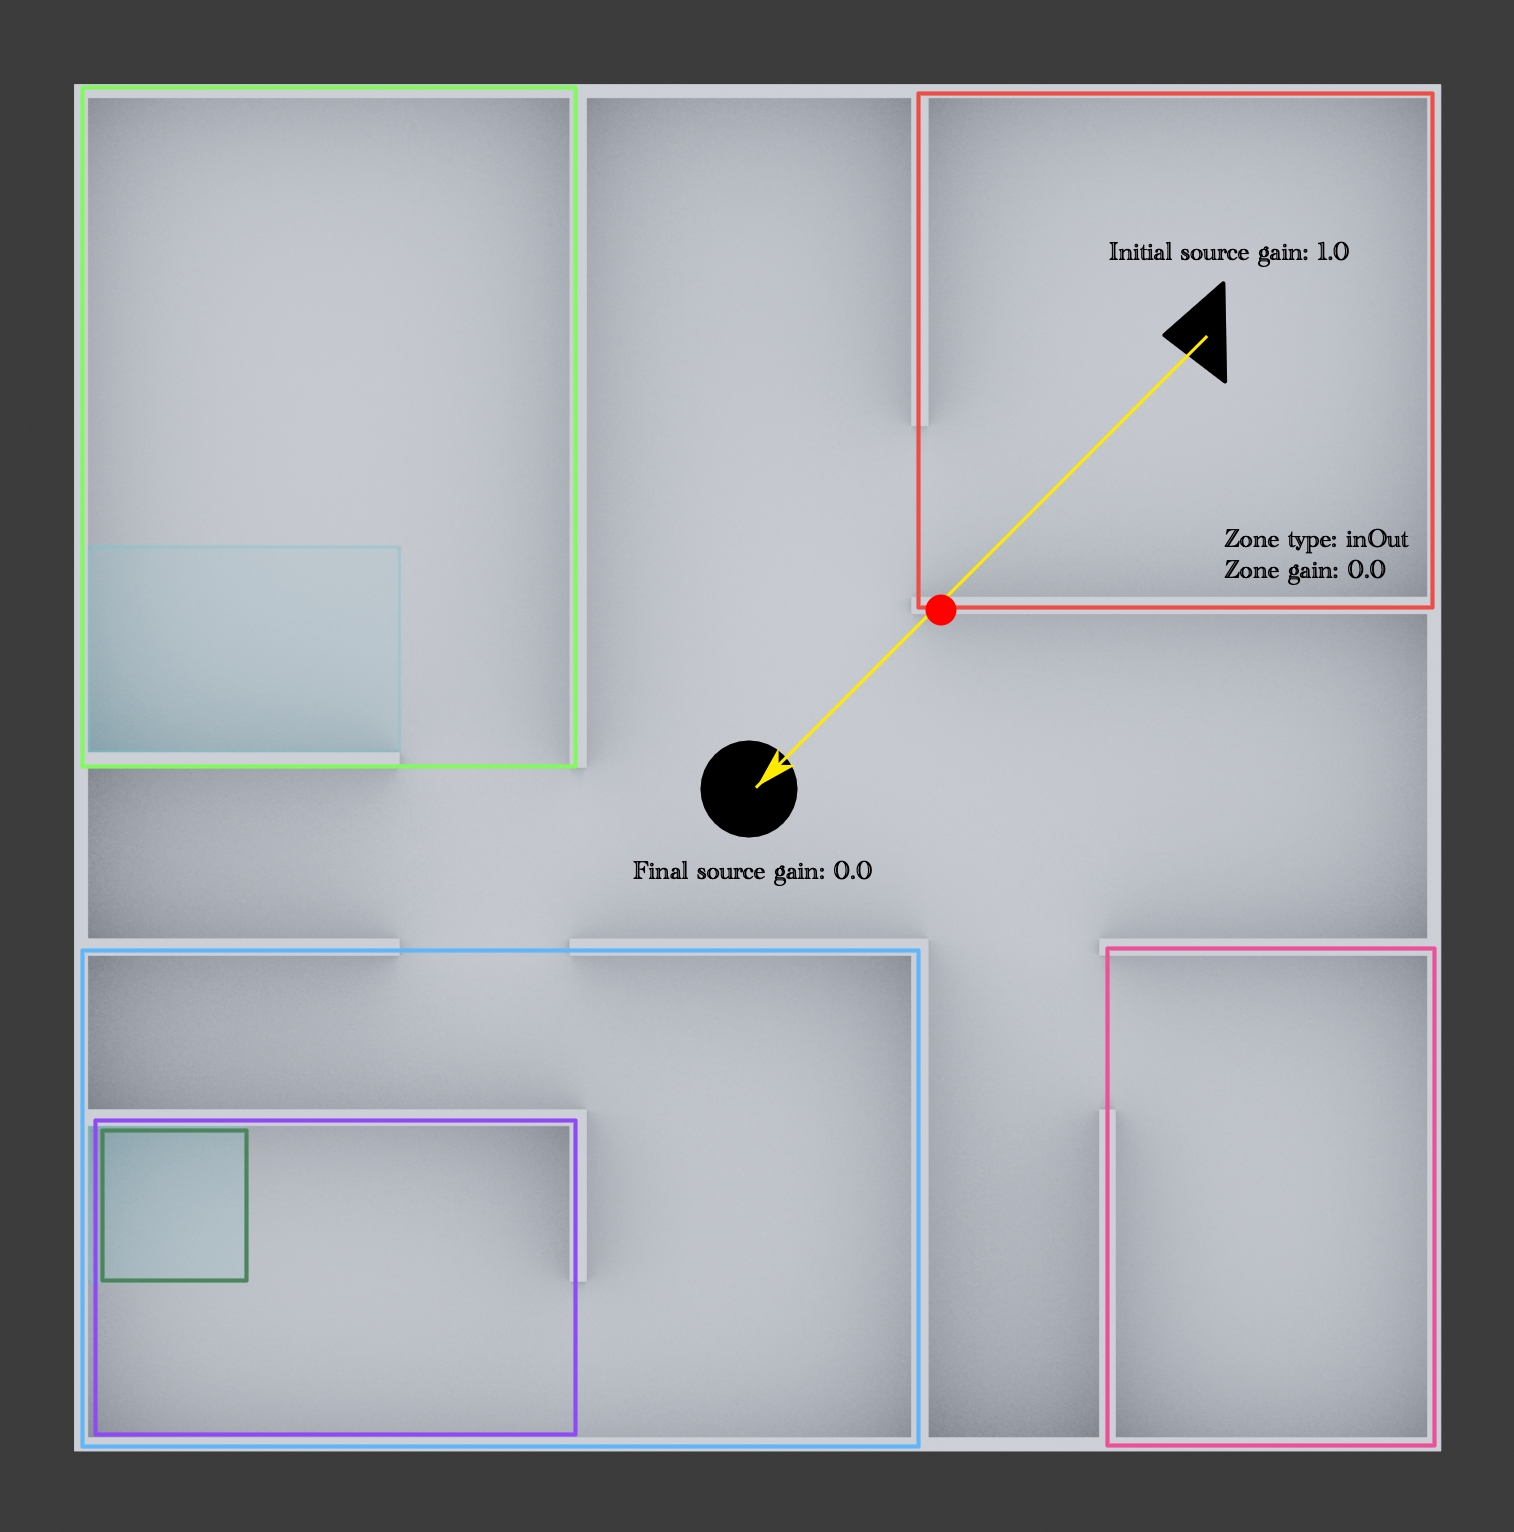
Audio Zones work based on the audio source and the audio listener's positions and they can be of inOut and/or outIn types.
- inOut: The audio zone's parameters will be applied to audio sources inside the audio zone volume when the listener is outside the zone.
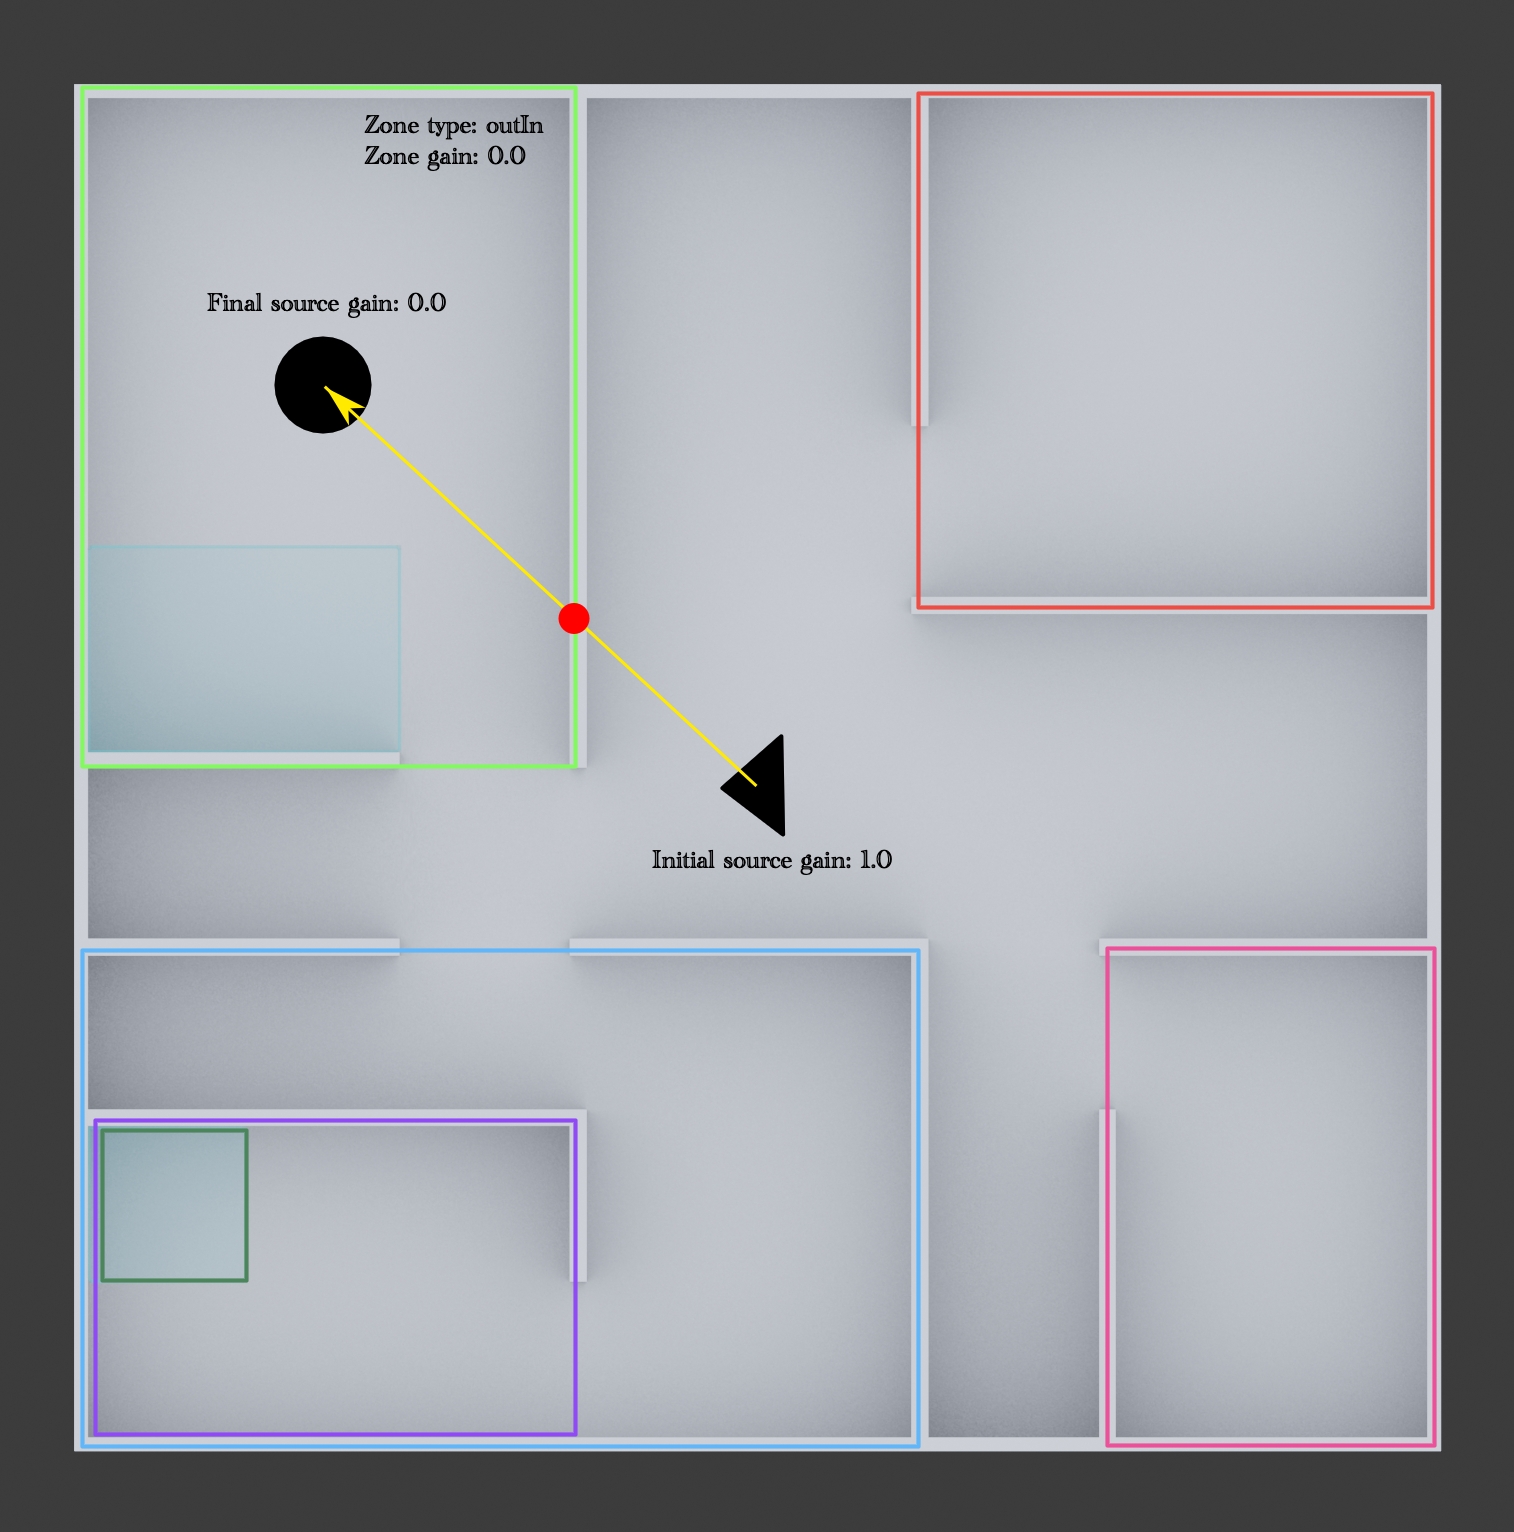
- outIn: The audio zone's parameters will be applied to audio sources outside the audio zone volume when the listener is inside.
AR Editor Integration in Creator
You can alter your models and generate QR codes for them with our AR editor integration.
Editing and Exporting Your Model
Within the AR editor, you have the freedom to edit and enhance your model according to your preferences. Depending on the specific model you're working with, different editing options will become available. For a comprehensive understanding of the AR editor's functionalities, refer to our dedicated section.
Now, begin by selecting the object you want to edit. Go to the Properties panel and click on the AR button.
Once you click the AR button, a modal containing the AR editor will appear.
For instance, in this scenario, we will make specific adjustments to the beard factor and the crown's color. Follow these steps:
Navigate to the palette section and choose the material you wish to modify.
Adjust the factor and texture of the model to your liking.
Once you've edited your model, simply click the 'Export model' button.
Your modified model will be displayed in the viewport, allowing you to position it as desired.
Creating a QR Code for Your Model
You also have the option to generate QR codes for the models within your scene. Here's how:
Select the model you want to create a QR code for in the viewport.
Click on the AR button.
Then, proceed to click the 'Export QR code' button. The QR code will be exported to the viewport, enabling you to position it in your scene as needed.
This QR code can be scanned by your audience, directing them to the model in the AR editor. They will then have the opportunity to experience the model in Augmented Reality.